How to Create a Flower using a Fence Die
Save money by using your existing stash in new and creative ways. Go ahead and step outside of that box!
“WOW! That’s a great way to use a fence die.”
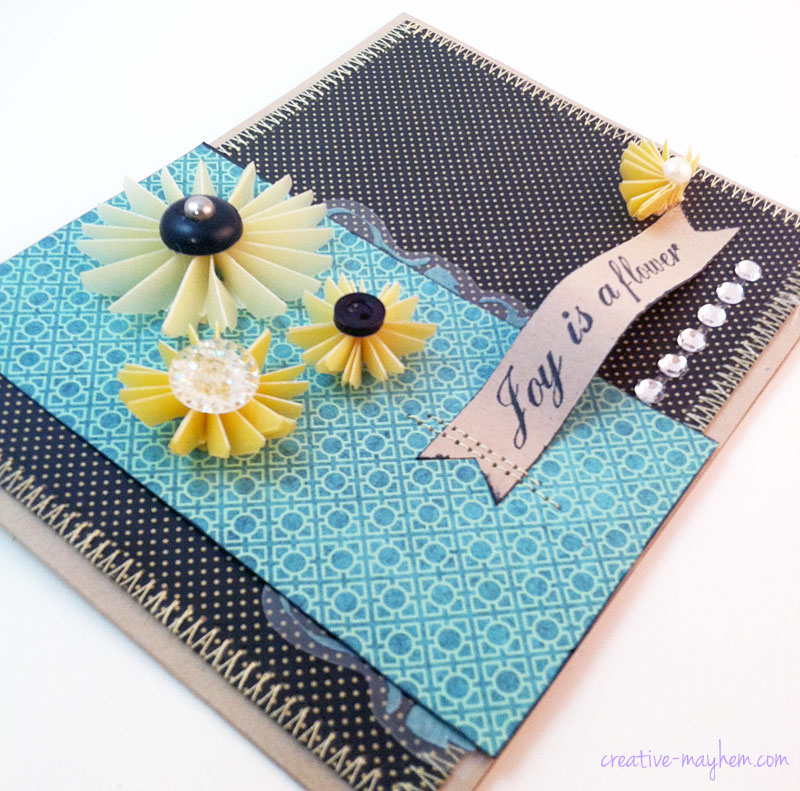
Today I have a great tutorial to share with you on how to create a flower from a fence die. Can you do that? Why yes . . . yes you can.
I am always looking for unique ways to use my crafting supplies. I love to think outside of the box. Besides, what a great way to save money too right?
Are you ready to learn creative ways to stretch your craft supplies? Queue the unique factor!
.Fence Die Facts
You can use any fence die to achieve this look. I have listed a few below.
* As an Amazon Affiliate I earn from qualifying purchases *
Picket Fence Border
D-Lites Picket Fence
Picket Craft Die
DID YOU KNOW YOU CAN USE A FENCE DIE TO MAKE A FLOWER!??
When looking at your craft supplies, try to think of different ways you can use them. Sometimes that just means taking a step back and looking at the final product in a different light.
Ask yourself a few questions such as: Does this look like something else? What does this remind me of?
Usually when I ask myself these simple questions, I come up with a unique way of utilizing my supplies.
Don’t be afraid to try it because there are no rules in crafting. Go ahead, make some MAYHEM!
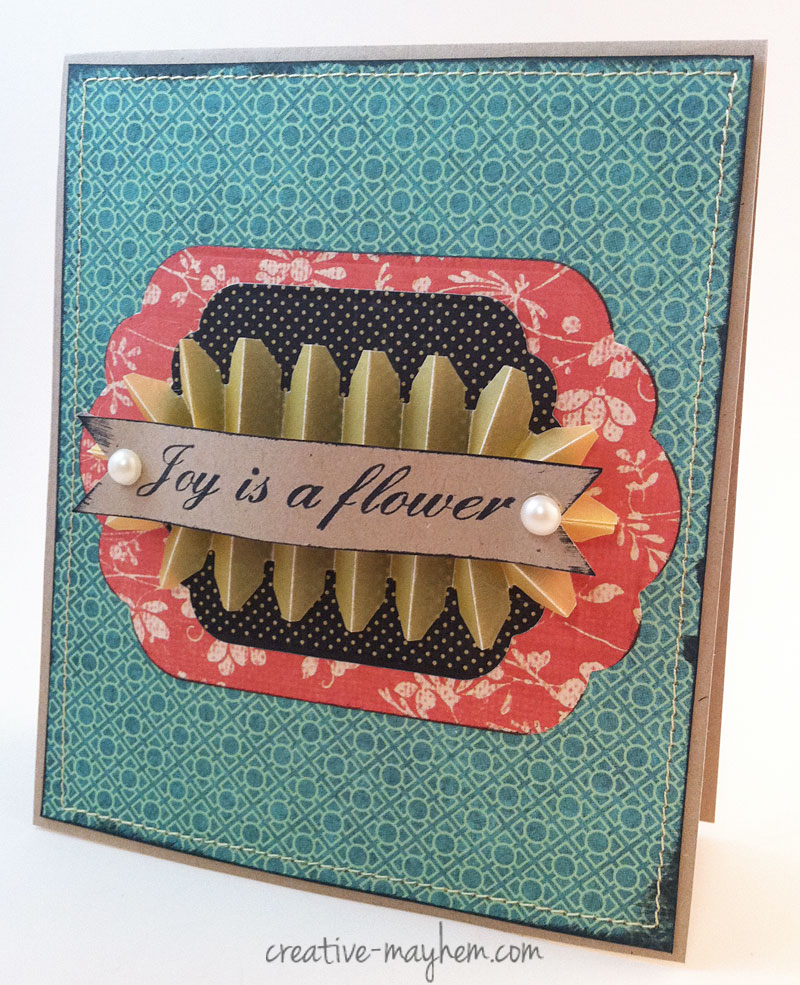
Flower tutorial
Step by step instructions for making flowers and other embellishments from a fence die

1. Prepare the vellum for cutting
To make the decorative accents and flowers, I chose to use a light weight paper called vellum. It’s really versatile because it’s much thinner than regular paper. I can run mutiple layers through a die cutting machine all at once. What’s not to love about that?
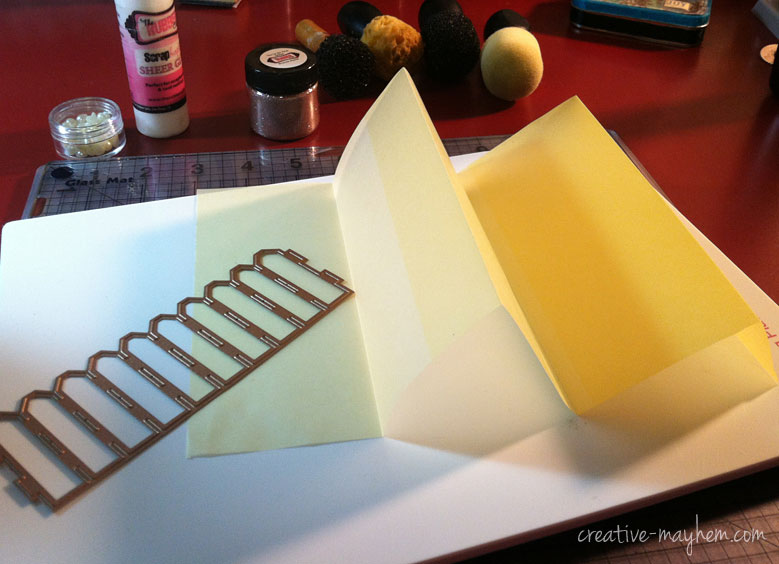
I simply folded the vellum a little bit larger than the width of the die and ran it through my cutting machine. Thus I was able to cut 5 layers of the vellum all at once.
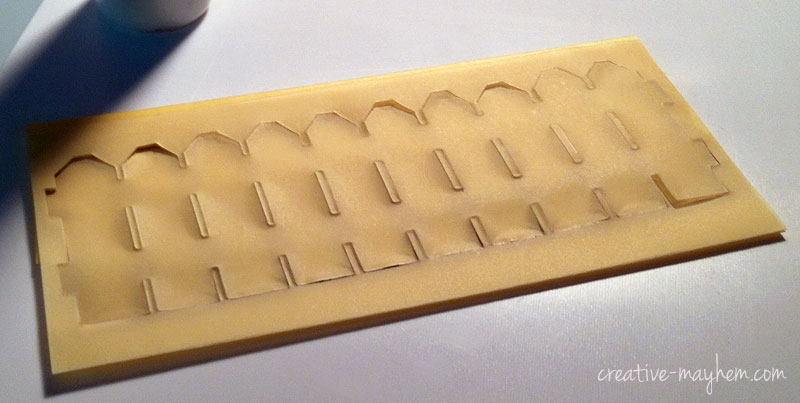
2. fold and Trim the fence diecut
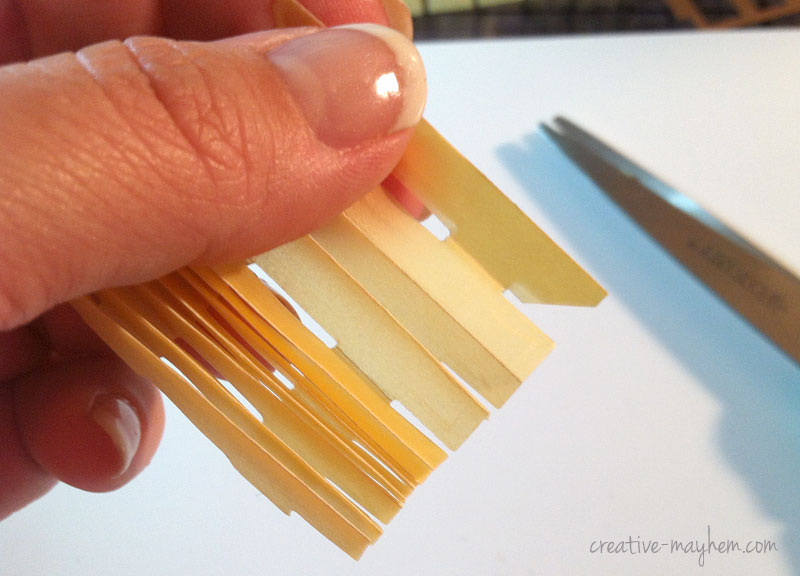
Next accordian fold the diecut at each post. Simply fold one way on one post and then the other way on the other post.
Alternate the folding until you reach the end of the diecut.
Finally snip the bottom posts of each fold to mimic the top posts. You want both the top and the bottom posts to match.
3. Fold and Glue to make the flower
Gather the fence diecut pleats tightly together and fold in half lengthwise.
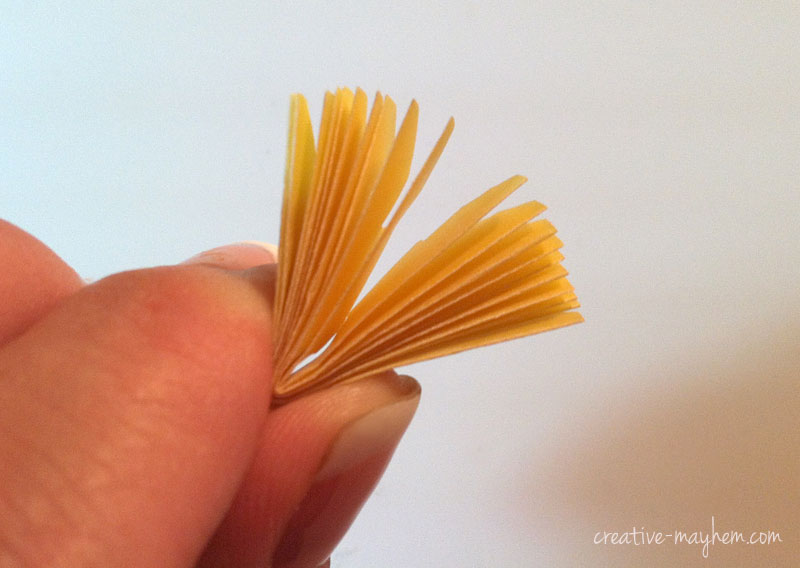
Where the two edges of the fence meet, place a bit of glue and adhere both sides to each other.
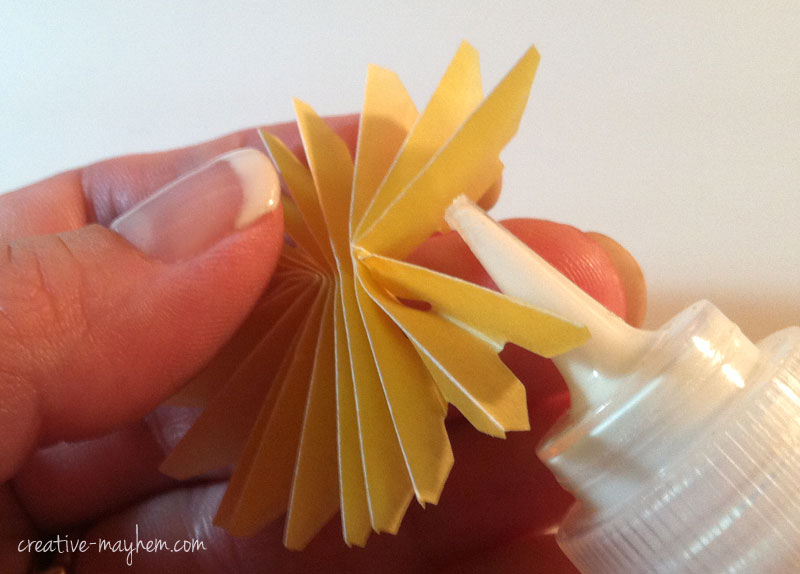
YOU CAN STOP HERE to use this as an embellishment
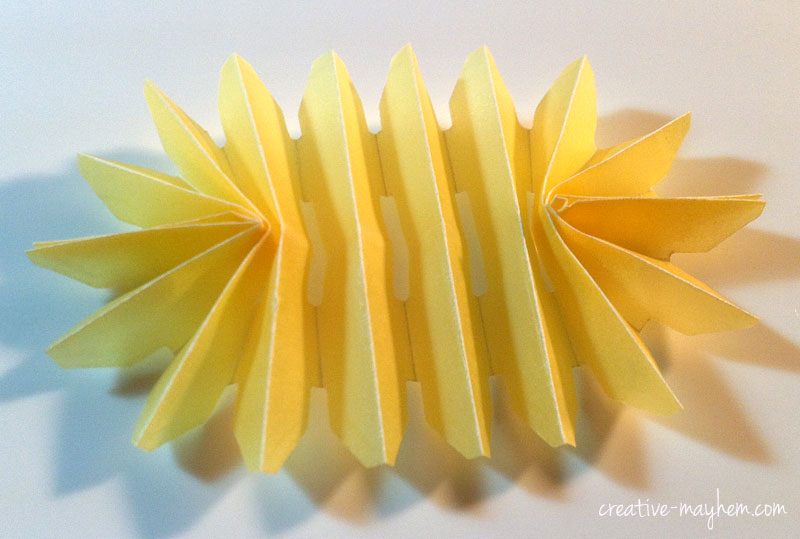
This was actually a happy accident. As I was making my first flower, I noticed that the flower could stretch out.
So I started to play a bit and decided it looked more like an embellishment.
BAM!
Look how cute it is!!
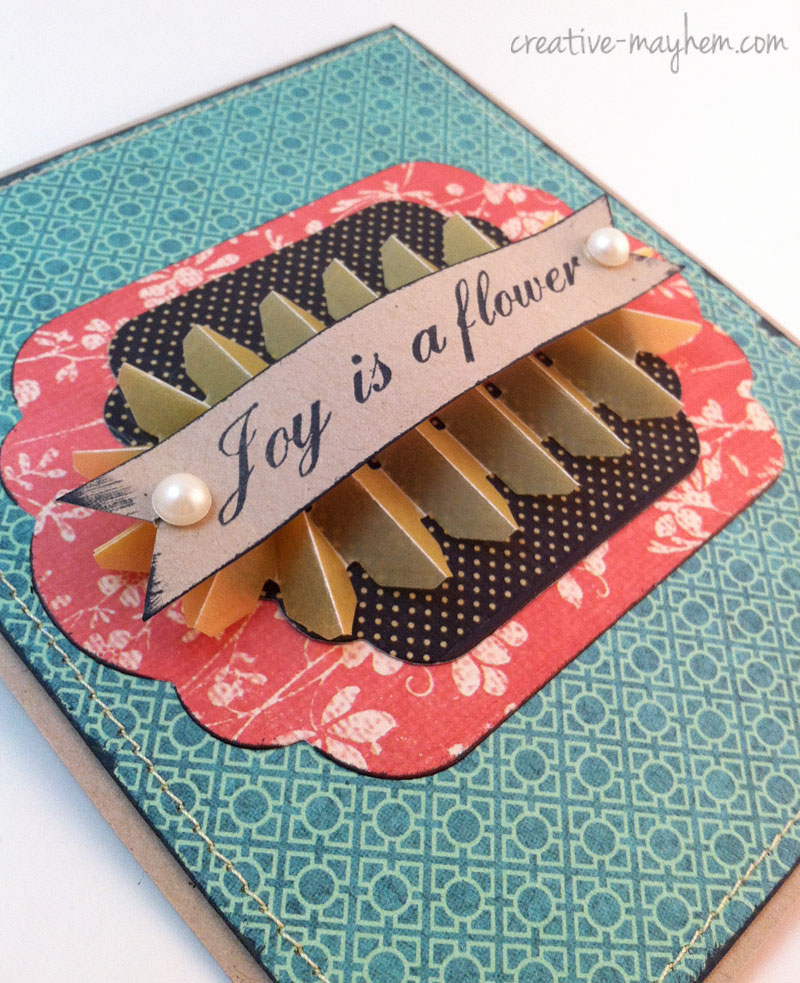
4. Glue and embellish
To finish the flower, simply glue the accordian pleats together in the center.
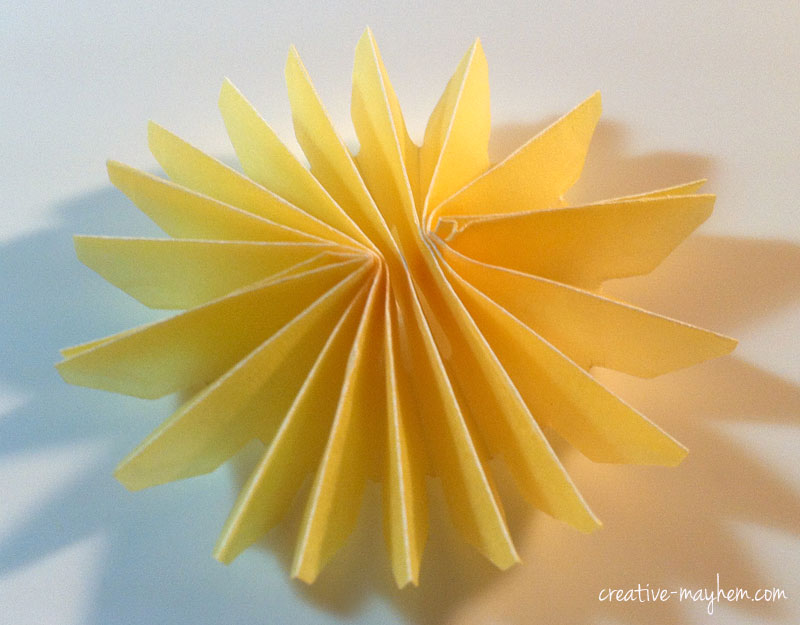
Layer the flowers to create a larger flower or simply glue a vintage button to the center of each rosette.
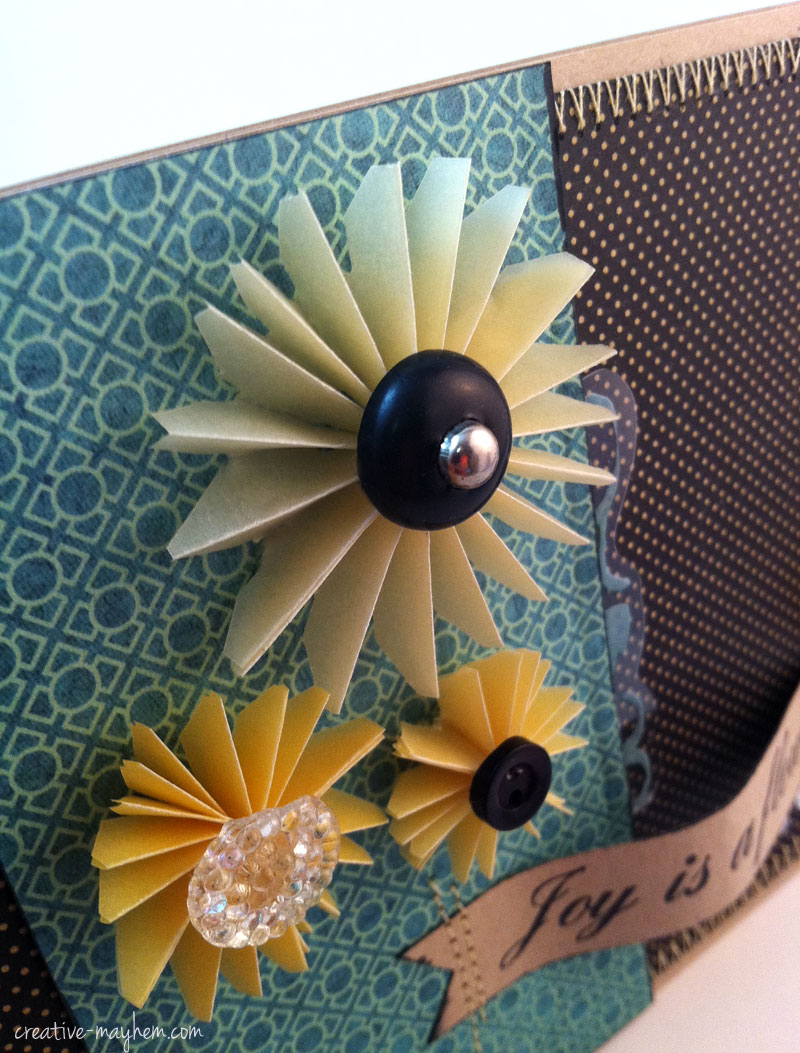
bonus tip:
To vary the flower sizes, trim the height of the fence diecut and followed the same steps as above.
post your project
I hope you enjoyed learning how easy it is to make a flower out of a fence die.
If you are inspired to step out of that box and come up with a unique way to use one of your favorite dies, let me know in the comments below.
I would love to hear about it and share your idea on my blog and YT channel.
Have a great day and go make some MAYHEM!
33 Comments
Submit a Comment
Join
Work With Me



absolutley amazing!!! Love that fence!
wow! thanx for this fabulous inspiration!
fantastic!
hugs and kisses from germany,
silvi xoxo
Very nice love the tutorial
What a wonderful creative use of the die!!! Gorgeous flowers looove your cards!!!!
Very creative way to use this fence die!
I am a follower.
slrdowney at hotmail dot com
Very creative use of that die!!!!!
WOW!! Love both of your cards and the rosettes you created with the On the Fence die template!! Fantastic tutorial–love all of the step-by-step pictures!! Fabulous Job!! ♥
Awesome.. how creative..
Awesome.. how creative..
fun flowers you've created! 🙂
Wow I would have never thought of is idea.
those flowers are simply wonderful I can think of a million ways to use them !!! Thanks for he insperation 🙂
So fun and creative ! Love how you used the die.
Thanks for sharing sweetie
Super cool use of the fence die. TFS
I love the flowers made from the die! What a great idea!
This tutorial was great- I also took a peek at the Faber-Castile one as well and have some at home so will have to play a bit now:) Thanks for sharing with us!
great aways of utulizing a die. Love your cards.
Seriously amazing use of the fence die! Wow who would have thought?
Amazing, thanks for sharing…
I’m a new follower! Love how you made rosettes and the cool embellishment using this die! Thanks for the tutorial!
Awesome!!!!
Thank you soooo much for the tut! who knew! lovely work.
I love the your creations 🙂 thanks for sharing
how cool – thank you for the fun tutorial as well as the cards.
Too cute! I really love how the center embellishment turned out. great inspiration and wonderful tutorial.
What a great way to show the diversity of this die. Wonderful
What a great way to show the diversity of this die. Wonderful
Thanks for the outside-the-box peek of other uses for the die.Lovely cards.
beautiful rosettes! makes the fence die so versitile!
very cute card thanks so much for sharing
Thanks for sharing your creative vision using the fence die! It’s always fun to see how others can look at the same thing and see very different possibilities!
cute cards.
Barbara Bird/Gecko Galz DT
MdStrwbery@aol.com
Mdstrwbery.blogspot.com
Woah! I’m really loving the template/theme of this site. It’s simple, yet effective. A lot of times it’s very hard to get that “perfect balance” between user friendliness and appearance. I must say you have done a amazing job with this. In addition, the blog loads super quick for me on Firefox. Exceptional Blog!